Organizing Your Home Office: DIY Desk In 5 Steps

Raise your hand if your Pinterest boards are littered with “someday” projects. For me, one pin in particular – this seemingly simple office desk from Buzzfeed – has been at the top of my dream DIY list for I don’t know how long.
After years of procrastination, I knew I had to tackle my home office. My way too small and dinged up IKEA desk was no longer sustaining the long hours I was putting it through – especially when it came to keeping my growing mound of business supplies and paperwork organized.
So this summer I scoured the internets for a desk matching this pin. None appeared. I got estimates from local carpenters for what I thought was an easy design ask. It wasn’t. At least not within my budget. I realized that if I wanted this desk I needed to put on my DIY socks and get to work.
DIY Office Desk: The Adventure Begins
I should mention here that I’m not a DIY type of girl. If I can “add to cart”, I will. After scouring YouTube and bombarding my local lumber store expert with questions, I found myself with two beautiful pieces of white oak, wood glue, stain, sanding materials, two great filing cabinet organizers and a can-do attitude. Check out the end of this post to see the materials that I used for this project.
Build Your Own Office Desk
If you’re feeling crazy like me and game for a little DIY desk challenge, here are the steps I followed. If you get tired of reading this, pop over to my DIY highlight reel on Insta. I won’t be offended.
Step 1: Glue It Real Good
This was the easy part. I slathered a thick layer of Elmer’s Wood Glue and stuck my two pieces of oak together. Why two pieces? First, design-wise, I wanted the table top to be nice and thick. More importantly, I wanted to reduce the chance of warping given that the desk was going to be long at 83 inches. Once glued, I added heavy weights to each end to keep them in place for a few days. Yes, clamps would have been better, but I didn’t want to invest in something I’d likely only use once.
Step 2: Sand, Baby, Sand
Next, using some fine grained steel wool I sanded the desk down. I later realized that I didn’t sand nearly hard enough. So if you’re giving this a go, do like Ice Cube and put your back into it. Yes, I added the link to the vid.
Step 3: Add The Trim
After confirming that the wood pieces were stuck to one another well, it was time to disguise the ugly desk edges. Unfinished edges are the clear giveaway of a DIY job.
Using wood edge tape that I got off Amazon and a heavy-duty household iron, I ironed the tape to the edges.
Full transparency: this step was the worst of this whole process. Ironing 1-2 inches at a time was painstakingly tedious but fully worth the 3 hours or so it took to complete. This is the step that made this actually look like a desk.

Step 4: Paint The Town Red
Once the trim was added and the desktop smooth to the touch, staining began. I used Watco Danish Oil in natural finish for a close to…well, natural…finish. I used two coats, sanding lightly in between.
After leaving to dry for another couple of days, it was time to varnish. I opted for multiple layers of Polyurethane (try saying that three times fast) to protect the desk from tea spills and messy kids since this will eventually be their homework desk as well.
If I were to do this again, I’d forego staining and skip right to the polyurethane. Unfortunately, even the natural finish altered the color a bit too much for my liking.
Step 5: Move It Indoors
Once everything was dry and odor-free, it was time to move the table top into my new office space. Because of the sheer weight of the desktop, I merely popped the oak top to my two new IKEA filing cabinets. It sits securely even without glue or bolts. If my kids start using this as a Ninja Warrior obstacle course (very possible) than maybe I’ll consider that extra step.
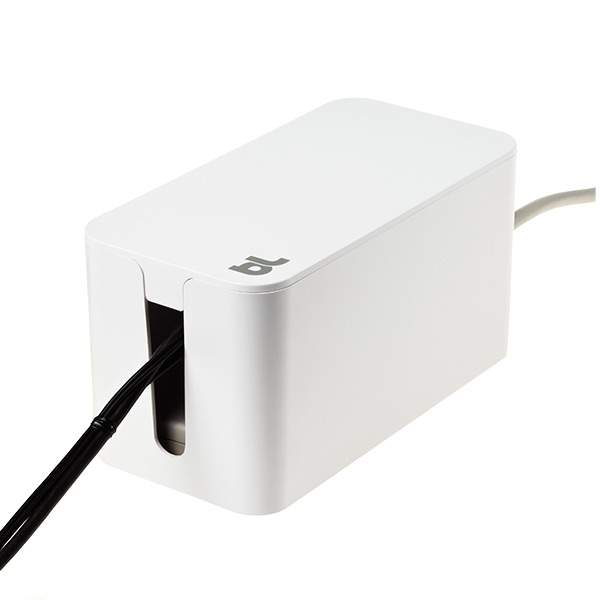
Once my laptop and monitor were placed on the desk, my organizing obsessiveness picked up another notch at the mounds of cables kiboshing my streamlined desk design. This cable box from The Container Store was my saving grace. It now disguises my ugly cables like a champ.

The Verdict
I am in LOVE with this desk, minor blemishes and all! I especially love the extra storage space that comes with the two IKEA filing cabinets. The cable box also adds yet another layer of streamlining that I felt was crucial given the simplistic and clean design of the desk.
When you break building your own desk in 5 steps it seems like an easy project. For a DIY newb like me, it certainly wasn’t a walk in the park. I had to keep reminding myself that I’m a professional organizer and not a carpenter. I’m glad I powered through.
Next up is organizing the filing cabinets. Stay tuned to see how I tackle this next phase to organizing my office space.

Shop The Look


Full disclosure: As an Amazon and The Container Store affiliate, I may earn a small commission from eligible sales.
You May Also Enjoy
 The Simply Sorted Home, LLC
https://thesimplysortedhome.com/wp-content/uploads/2021/04/IMG_1589.jpg
640
480
admin
https://thesimplysortedhome.com/wp-content/uploads/2019/02/The-Simply-Sorted-Home_logo_RGB-1-300x174.png
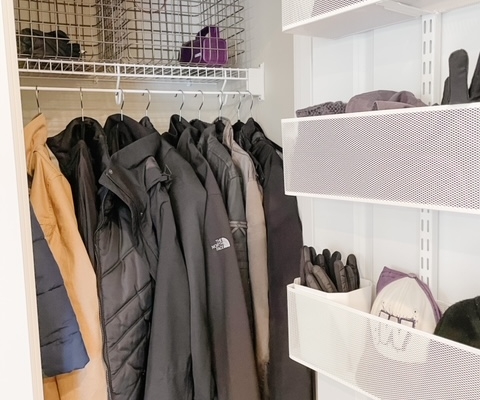
admin2021-04-10 16:40:042021-04-10 18:43:52Everything You Need To Know About Maximizing A Small Coat Closet
The Simply Sorted Home, LLC
https://thesimplysortedhome.com/wp-content/uploads/2021/04/IMG_1589.jpg
640
480
admin
https://thesimplysortedhome.com/wp-content/uploads/2019/02/The-Simply-Sorted-Home_logo_RGB-1-300x174.png
admin2021-04-10 16:40:042021-04-10 18:43:52Everything You Need To Know About Maximizing A Small Coat Closet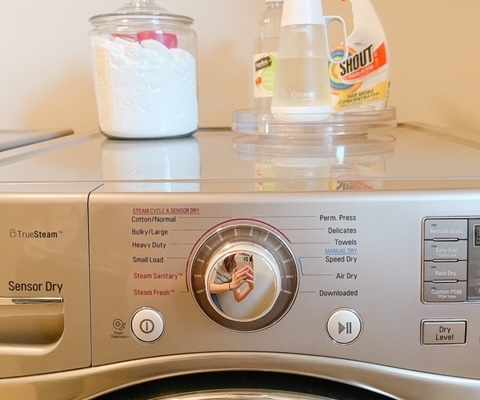 The Simply Sorted Home, LLC
https://thesimplysortedhome.com/wp-content/uploads/2021/03/IMG_0607-1.jpg
640
480
admin
https://thesimplysortedhome.com/wp-content/uploads/2019/02/The-Simply-Sorted-Home_logo_RGB-1-300x174.png
admin2021-03-26 23:23:322021-03-26 23:37:25Organizing Hacks For A Small Laundry Room
The Simply Sorted Home, LLC
https://thesimplysortedhome.com/wp-content/uploads/2021/03/IMG_0607-1.jpg
640
480
admin
https://thesimplysortedhome.com/wp-content/uploads/2019/02/The-Simply-Sorted-Home_logo_RGB-1-300x174.png
admin2021-03-26 23:23:322021-03-26 23:37:25Organizing Hacks For A Small Laundry Room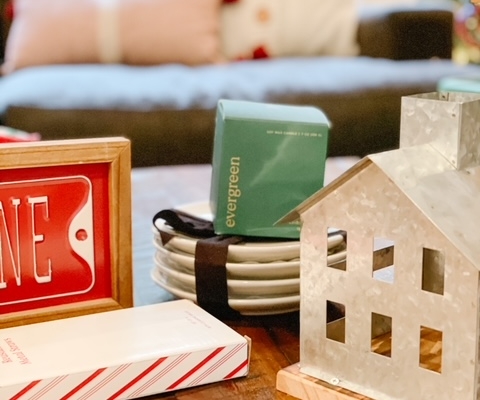 The Simply Sorted Home, LLC
https://thesimplysortedhome.com/wp-content/uploads/2020/12/Christmas-Keepsakes.jpg
640
480
admin
https://thesimplysortedhome.com/wp-content/uploads/2019/02/The-Simply-Sorted-Home_logo_RGB-1-300x174.png
admin2020-12-21 18:12:172020-12-21 18:28:37Storing Holiday Decorations
The Simply Sorted Home, LLC
https://thesimplysortedhome.com/wp-content/uploads/2020/12/Christmas-Keepsakes.jpg
640
480
admin
https://thesimplysortedhome.com/wp-content/uploads/2019/02/The-Simply-Sorted-Home_logo_RGB-1-300x174.png
admin2020-12-21 18:12:172020-12-21 18:28:37Storing Holiday Decorations